Sunday, December 31, 2017

Baby snuggler

I have been on a baby-snuggler-sewing-kick recently. I want to be fully prepared to keep my baby warm when she arrives, and my house is awfully drafty plus this is turning into a particularly cold winter even in Alabama. I found a simple and very easy snuggler/swaddler pattern here that I will surely make many times over.
Putting the printed pattern pieces together was a little tricky though. The pattern has two pieces and you need to cut one from each the outer and lining fabric: back piece and front leg pocket. I used fleece from Jo-Ann's for both the outer and inner fabric, and was really surprised with how little fabric is needed to whip up one of these snugglers.
I plan to make more of these, they are just so easy! The next one will be with low pile fur for the inner layer for extra warmth in my cold apartment. This pattern could also be easily modified to make it into a stroller-compatible snuggler/sleeping bag wrap.

First I sewed in the darts and attached the velcro on the leg pocket and front wraps. Then I sewed the leg pocket to the back piece for both the lining and the outer fabric.

Next, with right sides facing in, I sewed the lining to the outer fabric, leaving an opening to turn this right side out. The opening was then hand stitched closed.
 Cant wait to wrap up a baby in this cute little snuggler!
---------------------------------------------------------------------------
So I have been using these snugglers for the past month with my newborn - and they are a game changer! She sleeps so well in them and they are just soo easy to make and use! I ended up making 3 fleece snugglers for the cooler weather, and now that it is getting warmer I also made 3 in soft cotton.


Winter baby bonnet

I recently discovered Purl Soho, which is a gem of a website filled with adorable patterns including some that are free! The first pattern from this site that I tried was their Winter baby bonnet, which you can find here. I used remnant cotton fabric for the outside and fleece lining. I would use this pattern again, but think that next time I would modify the pattern so that the strap ties could be at least 1 inch longer as my final bonnet seems like tying it may be a little difficult.
 After sewing the inside and outside together with right sides facing, I then flipped this to right side on the outside. The opening was then hand stitched closed.
 So excited to coordinate this bonnet with the cloth baby shoes I made!


DIY cloth baby shoe

I am starting to feel a major nesting urge now that I am nearing the middle of my 3rd trimester. All I want to do is make things for the baby, who is due mid February. While I know that shoes will not be terribly practical for a newborn, they are just the cutest tiny things to make and take so little fabric to complete. I found a wonderful baby shoe tutorial with a free modifiable pattern here, and I definitely plan to make these again. These would also make for a darling baby shower gift!
Each shoe is composed of 3 pieces. I used a lovely cotton remnant of a Japanese fan pattern for the outside and, because I am having a winter baby, fleece lining. Fabric remnants are likely sufficient for these shoes. You will also need a little 1/4 inch  of elastic for the top of the shoe.
Once the inner and outer layers were sewn together, I sewed the toe part to the sole. 
 With right sides facing in, I then added the heal piece to each shoe.
The next and last step is to add the elastic on the top edge of the heal piece. This elastic is then tied to make the shoe secure and snug.

 Cant wait to see baby feet in these!


Sunday, October 29, 2017

How to make a Curious George "Man in the yellow hat" felt hat


Felt "Man in the Yellow hat" hat
I have to say, Halloween is my all time favorite holiday! Its such a great excuse to make fun costumes and an opportunity to dress up in extravagant costumes for a night!  
A friend of mine has an adorable little son who is going to be The Man in the Yellow Hat from Curious George for Halloween. The hat, which is obviously a crucial part of the costume, turned out to be very difficulty to find in Halloween stores. I was more than happy to try to make one, although I had never made a felt hat before! I used this blog post as guide, with a some modifications. 
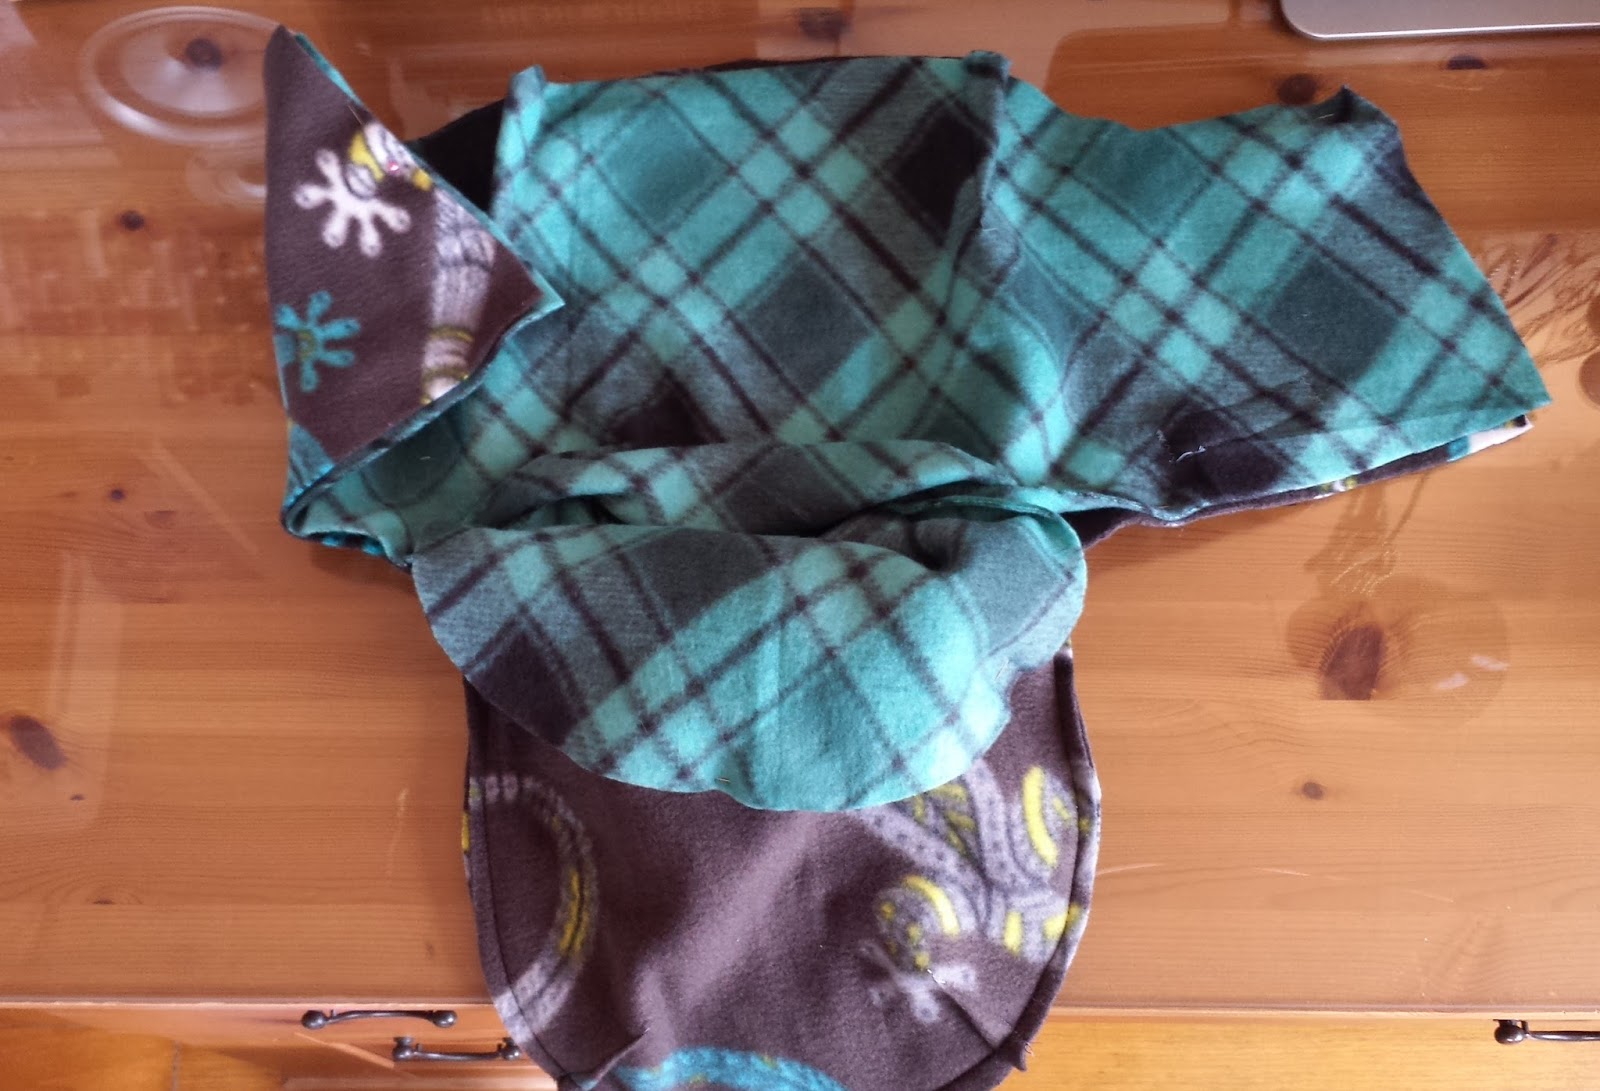
I do have to say, if you are thinking of making a hat following these instructions does takes some time, not only for the actual construction but also because some of the steps involve wetting the felt and waiting for it to dry. It took the whole weekend to complete this project. In retrospect, I think the wetting and gluing of the felt could probably be omitted if you just make a few concentric stitches sewing the two brim pieces of felt together. Sewing in jewelry wire to stiffen the brim edge worked quite nicely. 
Using trigonometry to calculate the radius, I cut two circles through double layered acrylic felt to make the brim of the hat. I had planned on the brim being 7 inches - this ended up being way to big and I trimmed it down to 4.5 at the end. The kiddo's head circumference is 19.5 inches, so I cut an inner circle that was 2 inches less - 17.5 inches in circumference. You need to make this smaller than the desired circumference because the felt will stretch when wet, and because you need the extra fabric to shape the felt into the desired hat-shape. 
 I then ran each of the pieces of felt under water and gently rung them out. I laid the first one down onto plastic and coated it with a 50:50 mixture of modge podge and water. I then placed the second piece on top of this and coated this also with the modge podge mixture. The original directions were for using elmers glue in water, but I did not have any elmers glue on hand. Perhaps elmers glue would work better, or maybe I added too much water in my mixture, but either way the two pieces didn't stick together completely and weren't totally firm. I was able to fix this at the end with a little sewing and jewelry wire.

Shaping the felt
Next I shaped the inner circle to raise up vertically. Luckily, I had a pot that was 19.5 inches in circumference! I think using cardboard here would work just as well though, as long as it is covered in plastic since the felt is wet and tacky with glue. I then left this to sit and dry, which took a very long time!
I doubled a piece of felt and cut two crescent curves for making the top part of the hat. The lower edge was 19.5 inches (plus a sewing margin), while I wanted the top to be 8 inches.
I made a second line with pins 2 inches down from the top of this cone. The top of this hat has a round shape, and this required several curve shaped tucks. I wanted the taper to begin 2 inches from the top.  

I then folded the cone in half again and cut curves into the top, extending down to the 2 inch mark I had made.
 These curves were then sewn to each other, and the free ends were also sewn together, thus making a nice top for this hat! I was very pleased with how the rounded top came out too! Yes it has seams in it, but I think that is OK for a Halloween costume.


Once the brim had dried (mostly), I hand stitched the top to the brim. Perhaps the brim pieces would have held together better had I let them dry all of the way, but I was running out of time.
 At this point I realized the brim was way to big for a kid (7 inches is probably a great size for an adult though)! I trimmed it down to 4.5 inches, and then used two pieces of 24 gauge jewelry wire to reinforce the edge. I sewed these in using a wide zig-zag. This not only held the two brim pieces together, but also made the edge nice and stiff, just as I wanted it to be.

Thursday, July 20, 2017

June watercolor paintings


DIY lace baby dress

One of my good friends and co-workers is expecting a little baby girl soon, and to celebrate this happy occasion I thought this was the perfect opportunity to sew baby clothes! I love making baby clothes because the fabric choices can be so creative, and I adore sewing tiny outfits. Plus, baby clothes take so little fabric!
 I used the bodice from the pattern available for free here, and added a lined gathered lace skirt. The bodice was sewn with a jersey knit, and the edges were hemmed using my double needle.

 The bodice and skirt were then attached together with a blue knit band of fabric.


This was definitely a fun, quick and easy project! I also love the free pattern (link above). Now I cant wait to see the baby in the dress :)

Sunday, June 18, 2017

Cycling jersey


So last weekend my husband and I participated in our first sprint triathlon, which was both so much harder and more fun that I anticipated! We both love exercise, but had never done a triathlon. It was a relay race where he did the biking and I swam and ran. While we only got a finishers medal, I was just happy that we made it to the end! This race was, of course, a sewing opportunity for me to make us matching tops! The splatter spandex fabric is from The Fabric Outlet.
I made his cycling top using the Jalie 2216 pattern. I really like this pattern as it was easy to customize it to fit him very nicely. Next time I make it I will have the zipper extend to the top of the collar, however.


My top was not quite as exciting. I just copied a running shirt that I had at home. I was running out of fabric, so my shirt is snug fitting, but that is OK for an exercise shirt I guess!


Two-tone upholstery fabric tote

I have become obsessed with upholstery totes as of late, and really wanted to make one for myself. For this project I used left-over fabric from pillows I had made. Very little fabric was actually required, since the tote is two-tone.
 The straps are leather. After cutting them using my rotary cutter, I finished the edges with a thin painted line of modge podge. This gives a nice smooth, shiny finished leather edge and is super easy to do! I definitely recommend it for any leather project where raw edges will be seen. 
The tote itself is lined with black pleather and has an inner pocket. Overall a fun and easy project :)