 |
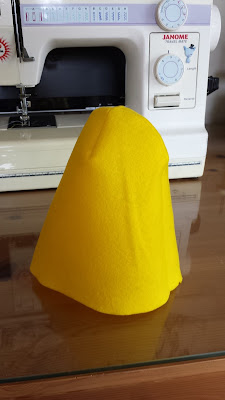
| Felt "Man in the Yellow hat" hat |
I have to say, Halloween is my all time favorite holiday! Its such a great excuse to make fun costumes and an opportunity to dress up in extravagant costumes for a night!
A friend of mine has an adorable little son who is going to be The Man in the Yellow Hat from Curious George for Halloween. The hat, which is obviously a crucial part of the costume, turned out to be very difficulty to find in Halloween stores. I was more than happy to try to make one, although I had never made a felt hat before! I used this blog post as guide, with a some modifications.
I do have to say, if you are thinking of making a hat following these instructions does takes some time, not only for the actual construction but also because some of the steps involve wetting the felt and waiting for it to dry. It took the whole weekend to complete this project. In retrospect, I think the wetting and gluing of the felt could probably be omitted if you just make a few concentric stitches sewing the two brim pieces of felt together. Sewing in jewelry wire to stiffen the brim edge worked quite nicely.
Using trigonometry to calculate the radius, I cut two circles through double layered acrylic felt to make the brim of the hat. I had planned on the brim being 7 inches - this ended up being way to big and I trimmed it down to 4.5 at the end. The kiddo's head circumference is 19.5 inches, so I cut an inner circle that was 2 inches less - 17.5 inches in circumference. You need to make this smaller than the desired circumference because the felt will stretch when wet, and because you need the extra fabric to shape the felt into the desired hat-shape.
I then ran each of the pieces of felt under water and gently rung them out. I laid the first one down onto plastic and coated it with a 50:50 mixture of modge podge and water. I then placed the second piece on top of this and coated this also with the modge podge mixture. The original directions were for using elmers glue in water, but I did not have any elmers glue on hand. Perhaps elmers glue would work better, or maybe I added too much water in my mixture, but either way the two pieces didn't stick together completely and weren't totally firm. I was able to fix this at the end with a little sewing and jewelry wire. |
| Shaping the felt |
Next I shaped the inner circle to raise up vertically. Luckily, I had a pot that was 19.5 inches in circumference! I think using cardboard here would work just as well though, as long as it is covered in plastic since the felt is wet and tacky with glue. I then left this to sit and dry, which took a very long time!
I doubled a piece of felt and cut two crescent curves for making the top part of the hat. The lower edge was 19.5 inches (plus a sewing margin), while I wanted the top to be 8 inches.
I made a second line with pins 2 inches down from the top of this cone. The top of this hat has a round shape, and this required several curve shaped tucks. I wanted the taper to begin 2 inches from the top.
I then folded the cone in half again and cut curves into the top, extending down to the 2 inch mark I had made.
These curves were then sewn to each other, and the free ends were also sewn together, thus making a nice top for this hat! I was very pleased with how the rounded top came out too! Yes it has seams in it, but I think that is OK for a Halloween costume.

Once the brim had dried (mostly), I hand stitched the top to the brim. Perhaps the brim pieces would have held together better had I let them dry all of the way, but I was running out of time.
At this point I realized the brim was way to big for a kid (7 inches is probably a great size for an adult though)! I trimmed it down to 4.5 inches, and then used two pieces of 24 gauge jewelry wire to reinforce the edge. I sewed these in using a wide zig-zag. This not only held the two brim pieces together, but also made the edge nice and stiff, just as I wanted it to be.


